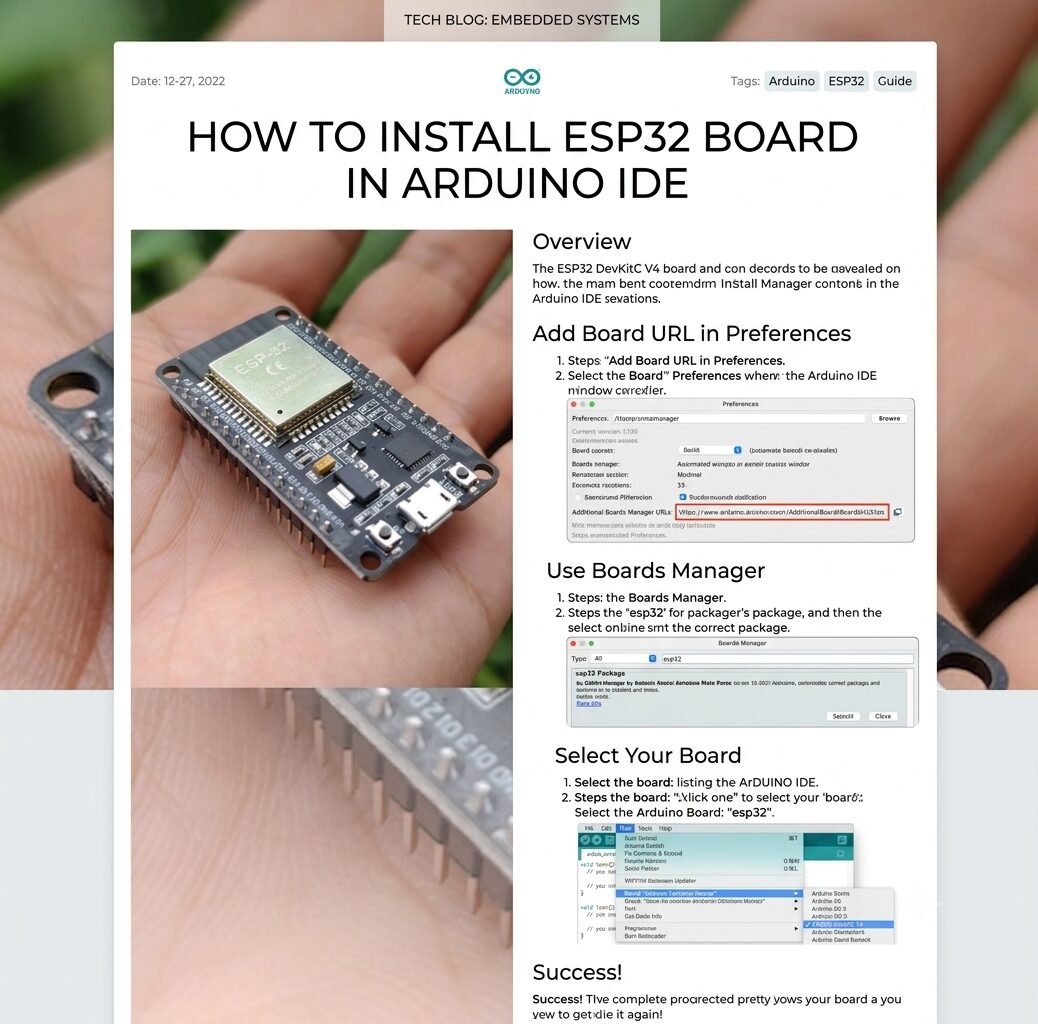
ESP32 Development board is the basic device that a beginner uses for IOT applications so the first step is to install the required board in the IDE .Follow the tutorial to successfully install.
Step 1: Download and install Arduino IDE (Recommended 1.8.19)
Arduino ide 1.8.19 is a stable release that supports most of the new and old library versions so it is recommended from my side. Download from the link below it would be mentioned as legacy version.
https://www.arduino.cc/en/software/
Step 2: Open Preferences and add the official Espressif Boards Manager URL.
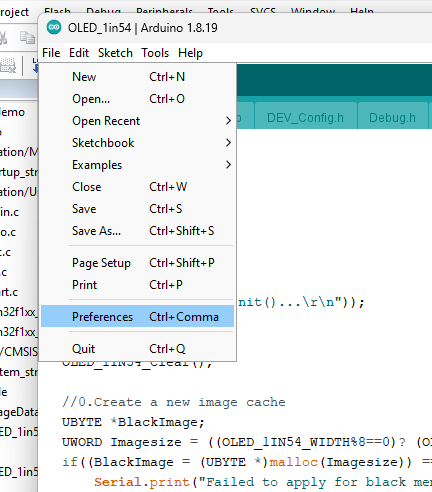
After Arduino ide installation is done now we need to open the software. In top tabs , go to File then to preferences as shown in below image.
in Preferences we need to add below link of official express-if esp32 library link. if you need to add stm32 support also i am giving both the links .The link is given below :
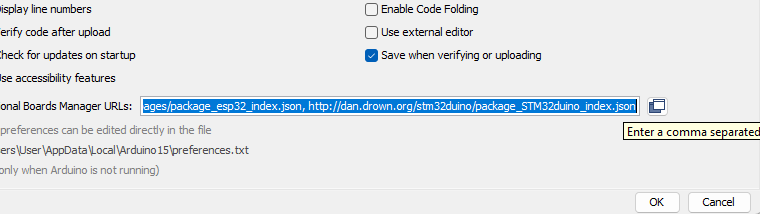
Now Press Ok and go for next step.
Step 3: Open Boards Manager and install ESP32 by Espressif Systems.
In Tools tab you will find the boards manager option that will install the required boards in arduino ide as shown below :
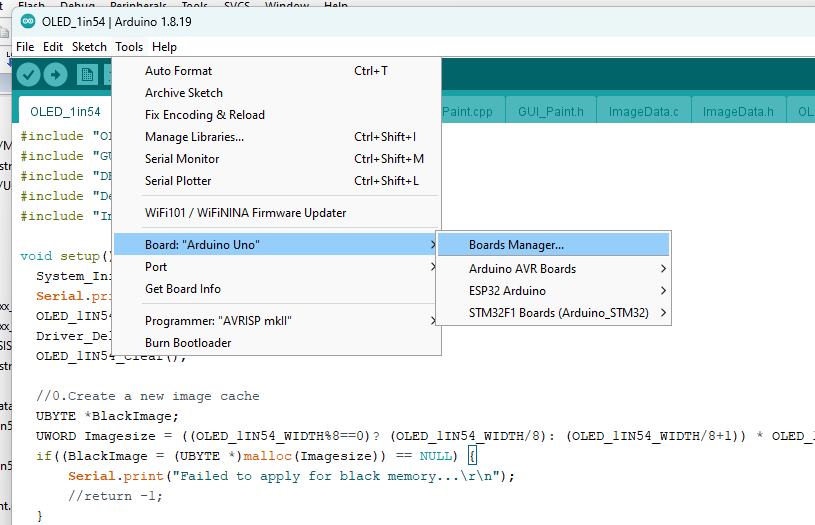
then click on boards manager . Arduino ide will load some libraries. Now we need to search for esp32 in search bar. Select esp32 supported package as shown below and install.make sure you selected the library of expressif systems.
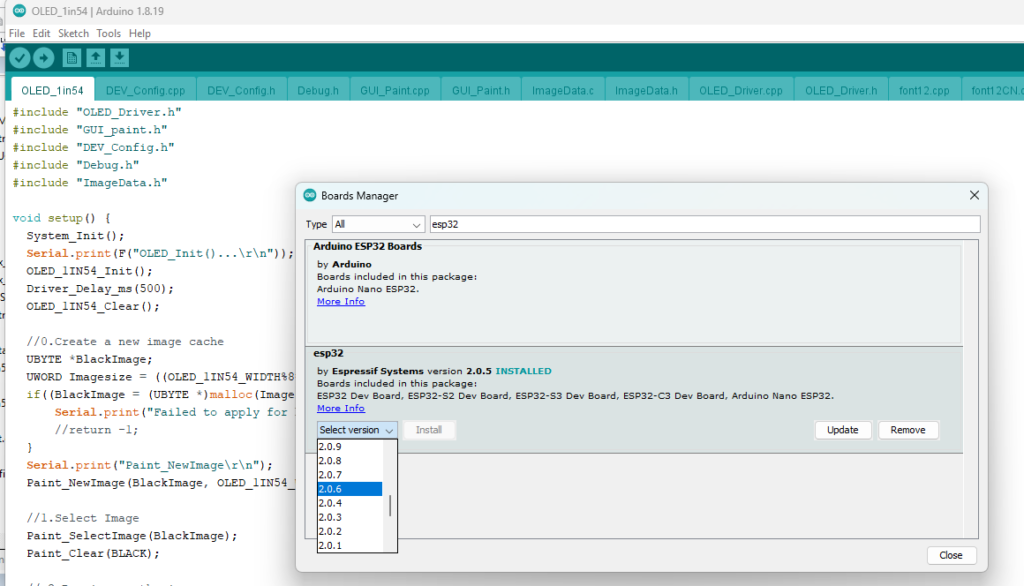
After installation it must show done installation otherwise you have to click install again.
Step 4: Connect your ESP32 board.
Now you should connect esp32 dev board or any esp board with your system usb port so you shoudl find an extra port is arduino ide tools option as mentioned below but you need to select your esp32 board type in tools also.
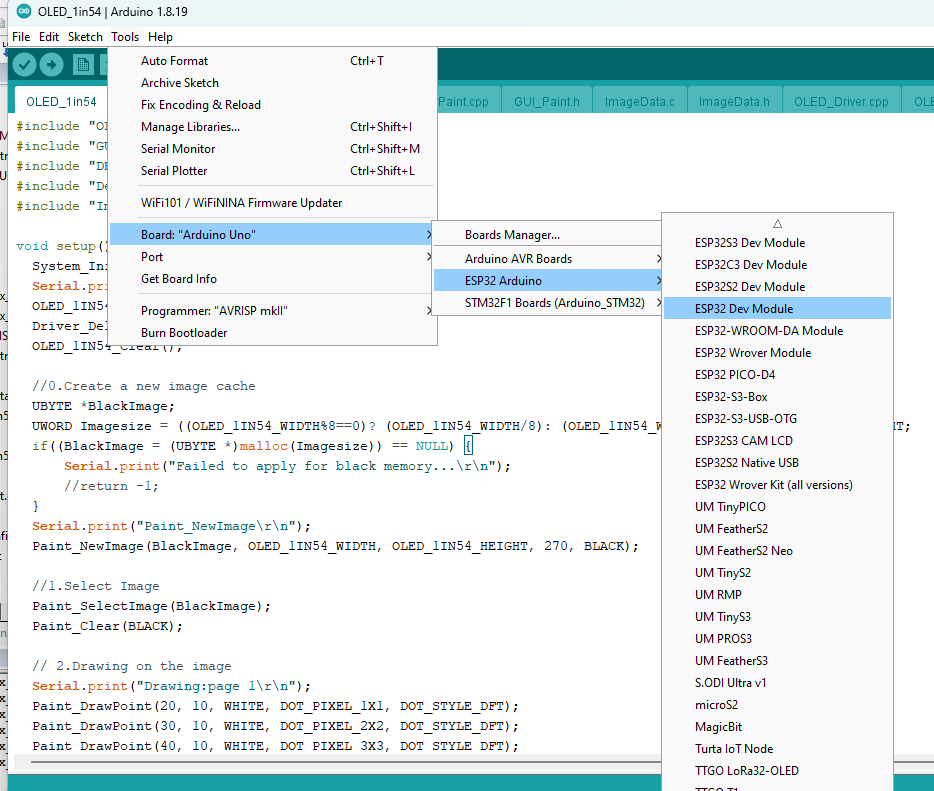
i have esp32 30 pin development board so i am selecting ESP32 DEV MODULE.Now for the port selction follow below .
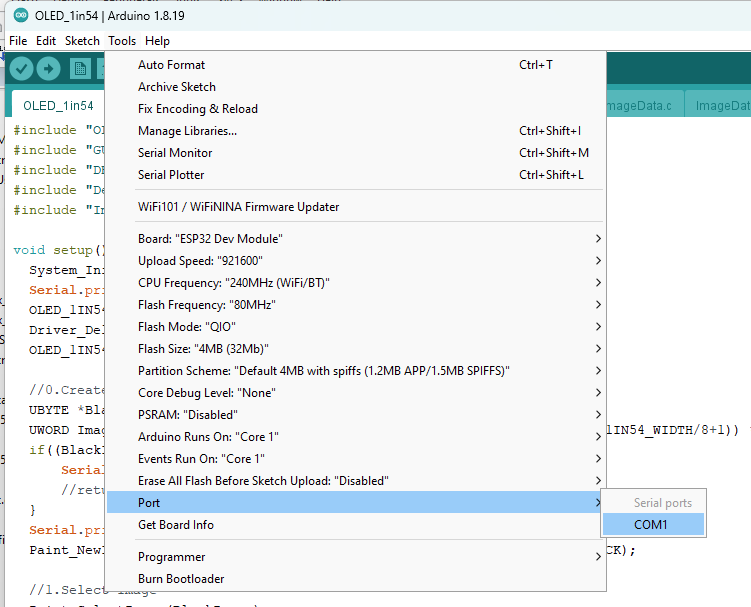
Step 5: Install USB drivers if the COM port does not appear (mention CP210x or CH340 depending on the board).
Now one must install the required usb drivers as per your dev board normally one of the below works.The link are given below .
https://sparks.gogo.co.nz/assets/site/downloads/CH34x_Install_Windows_v3_4.zip
Step 6: Upload a simple Blink sketch or WiFiScan example to verify the installation
To verify the installation , now upload the basic blink code as below by clinking upload button mentioned as right arrow in top tab. here is the basic code that should upload first time without any error. this code will work fro esp32 dev baords that have gpio pin 2 has built in led on it.
/*
ESP32 Blink Example
Board: ESP32 Dev Module
Onboard LED: GPIO 2
*/const int ledPin = 2;
void setup() {
pinMode(ledPin, OUTPUT);
}void loop() {
digitalWrite(ledPin, HIGH); // Turn LED ON
delay(1000); // Wait 1 seconddigitalWrite(ledPin, LOW); // Turn LED OFF
delay(1000); // Wait 1 second
}
Troubleshooting:
If ESP32 not detected check the onboard ic on your esp32 variant it it is ch340 or cp21… or ft232 series and install drivers as per device.
Some ESP32 Variants needs to press BOOT button on the dev baord during uploading. Latest boards are not required to do so as they have built in boot press option in them using transistors.